
Cyberwave is in Private Beta.
Request early access to get access to the Cyberwave dashboard.
Try a Real Robot Live
Get hands-on with Cyberwave in under 2 minutes; no setup, no hardware, no code. Control a real SO101 robot arm live in our robotics lab from your browser.Sign up for Cyberwave
Create an account at cyberwave.com or request early access if you don’t have one yet.
Click 'Try a Real Robot'
From the dashboard, click Try a Real Robot. You’ll be connected to a live SO101 robot arm with a camera in the Cyberwave robotics lab.
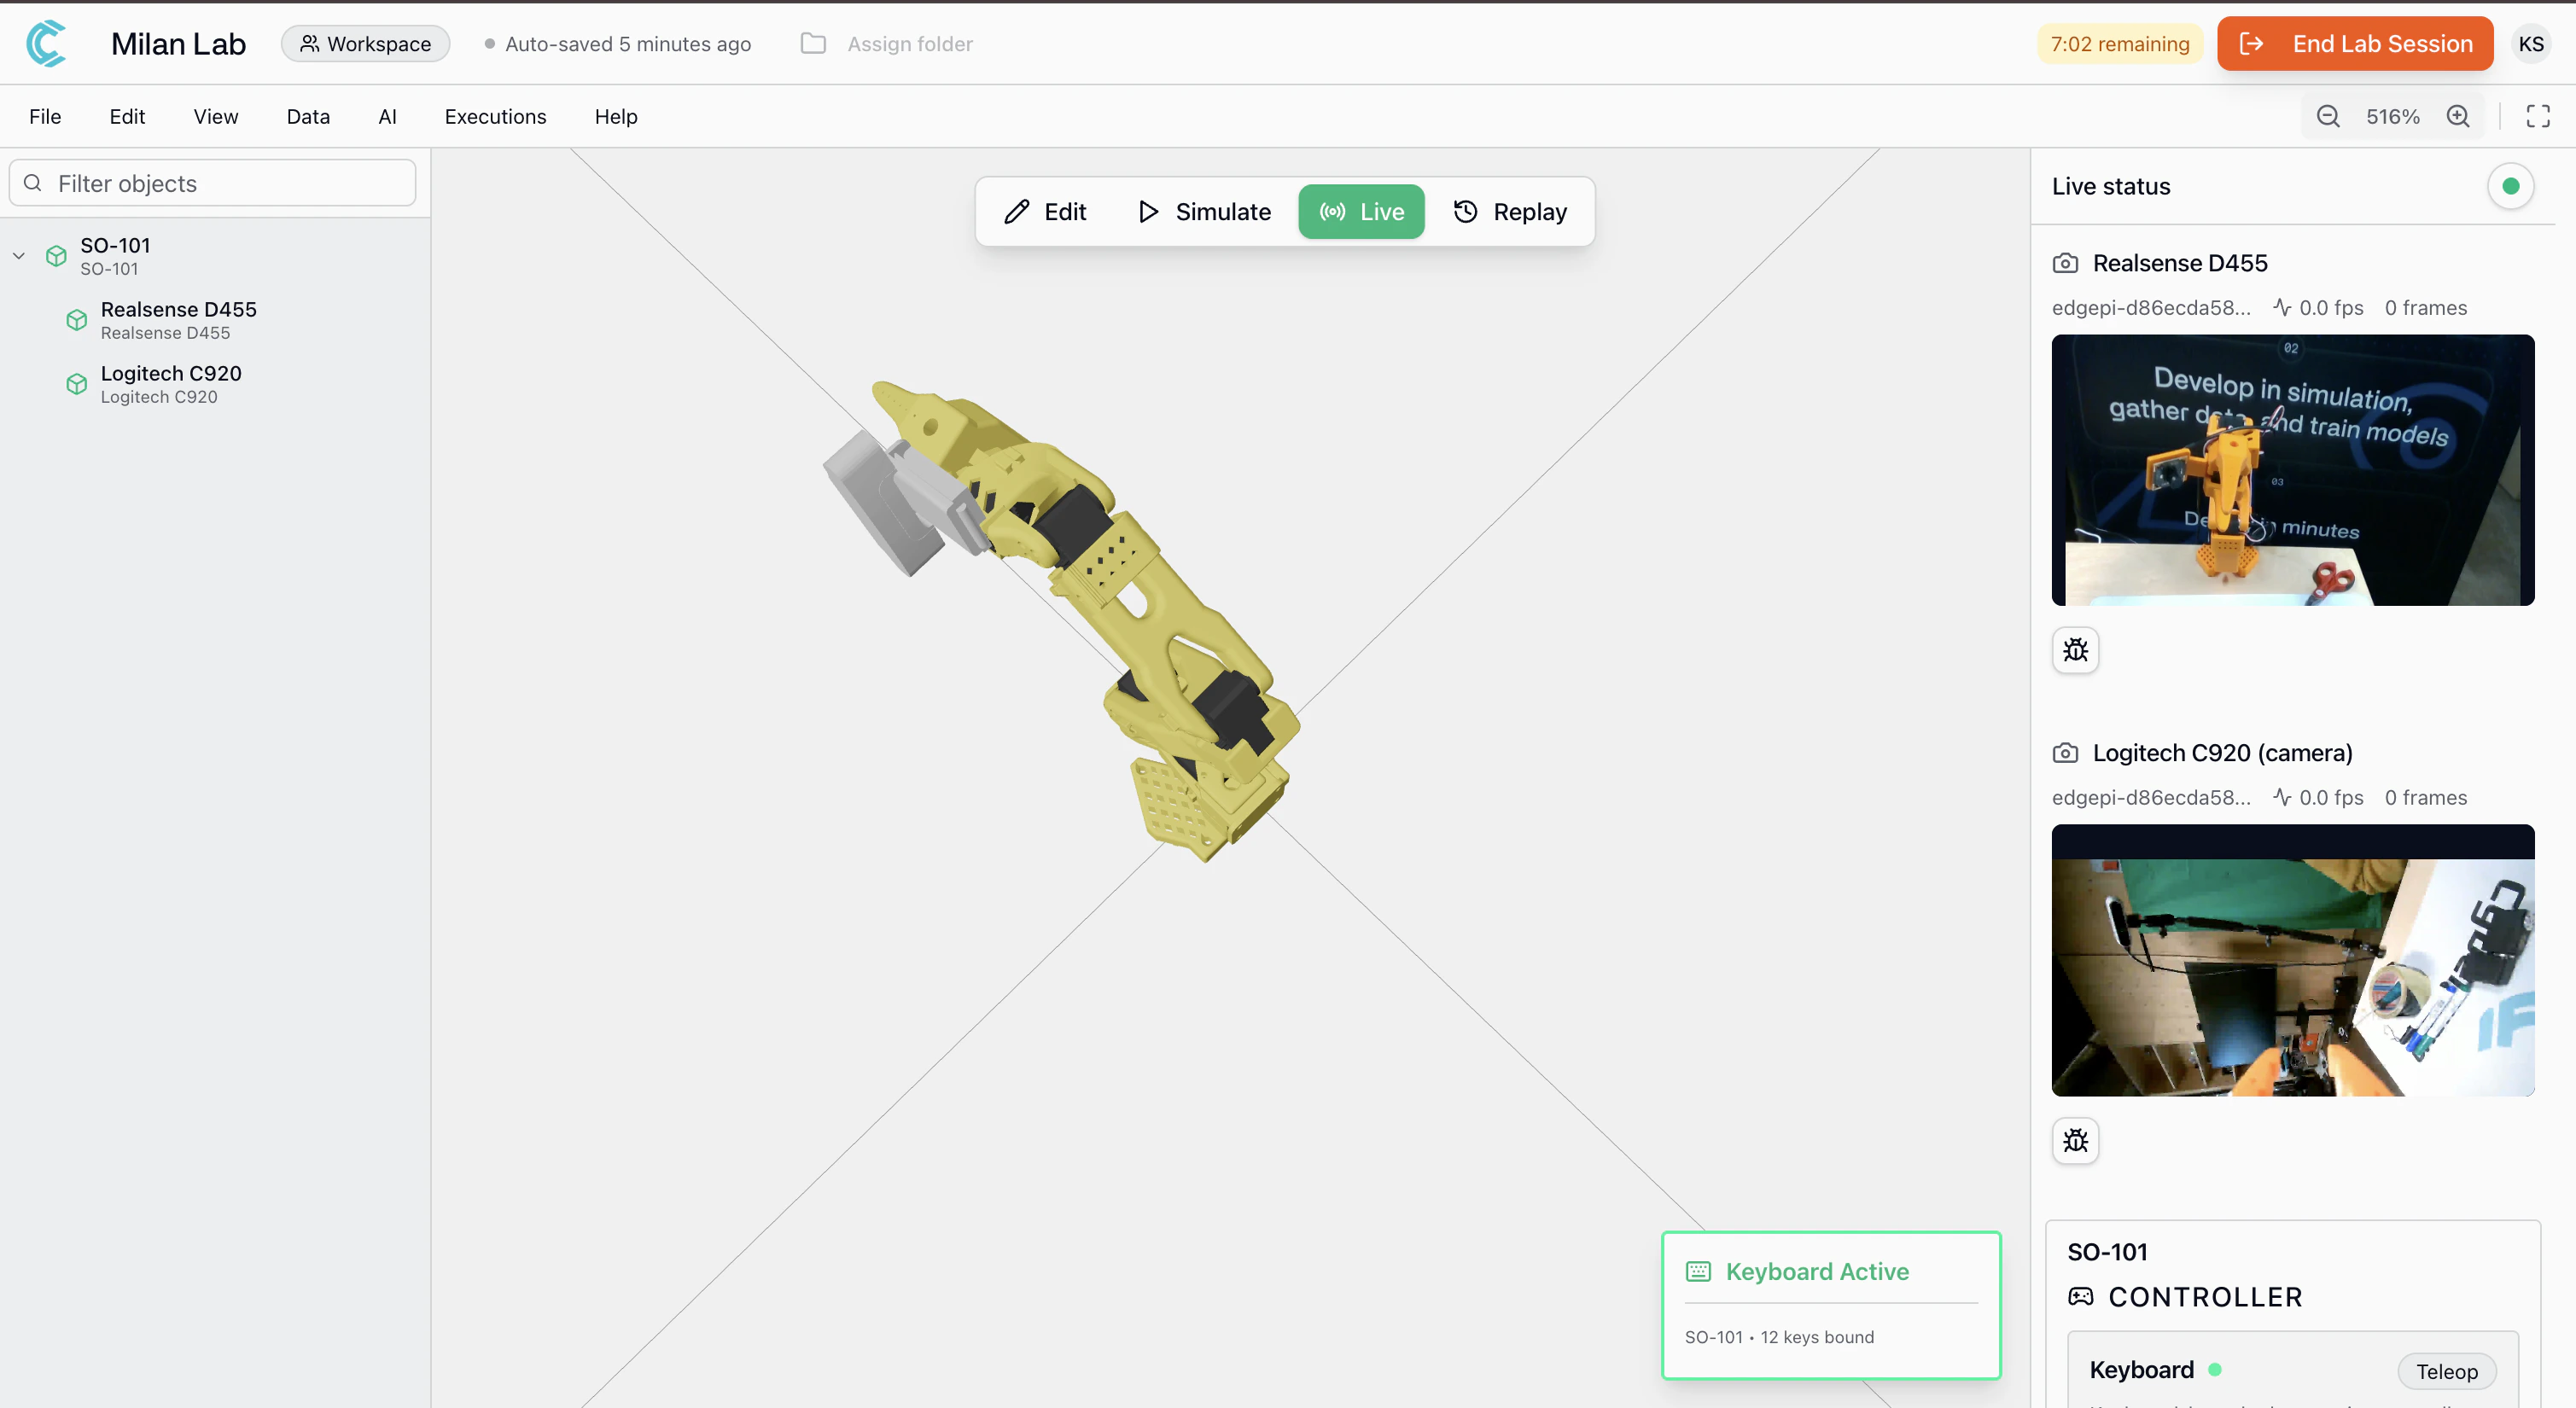
- Control the arm: a keyboard controller is pre-assigned, use it to move individual joints in real time
- Watch the live camera feed: see what the robot sees from the wrist-mounted camera in the Milan lab
- Record datasets: start a recording session to capture arm movements and camera footage, just like you would in your own setup
- Want a specific use case? reach out to the team and we can configure a custom demo for your needs
You’re controlling a physical robot from your browser. Everything you see here, joint control, camera streaming, dataset recording is the same experience you get with your own hardware.
Build Your Own Setup
Ready to go beyond the demo? This guide takes you from zero to a working Physical AI application. You will:- Create a virtual environment and add a digital twin of your robot
- Build applications using the Python SDK, MCP server, or REST API from your laptop, with no hardware required
- Connect real hardware so the same code drives a physical robot
Part 1: Develop in Simulation
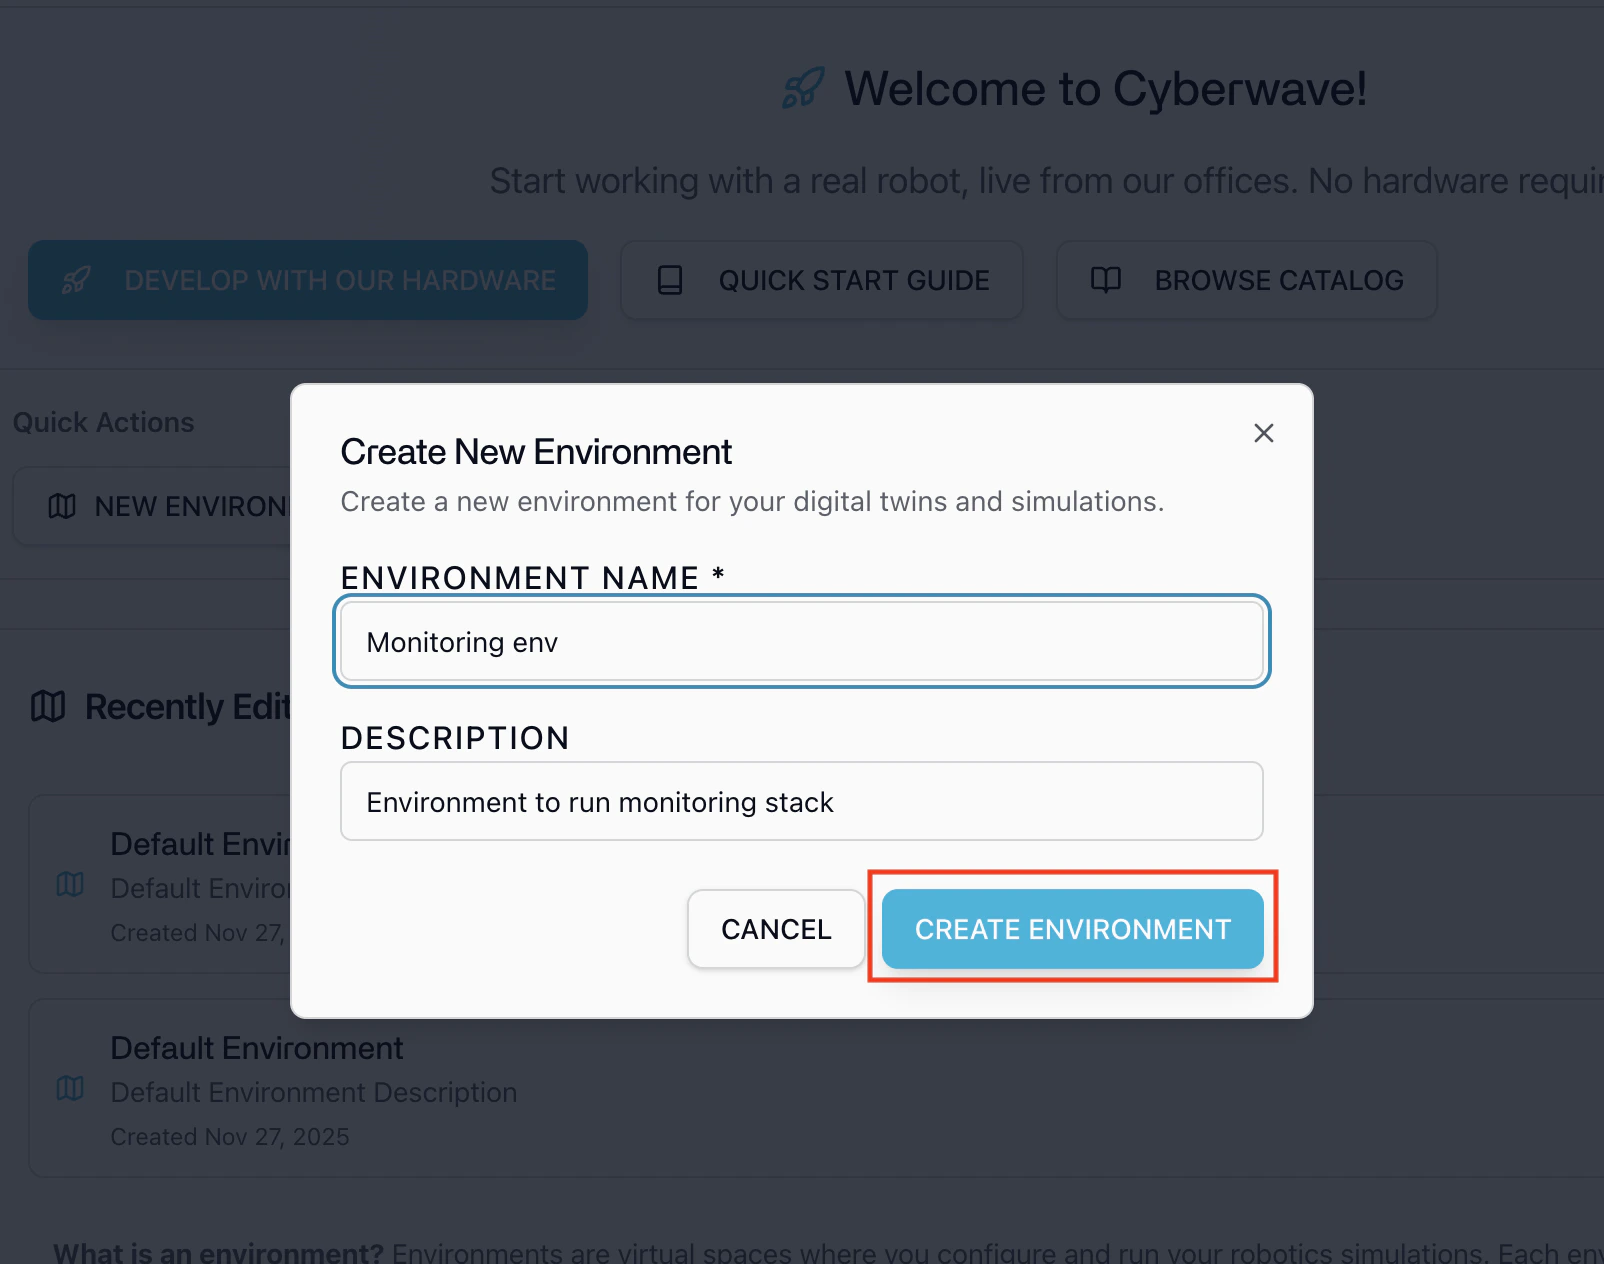
Start here. No hardware required.Step 1: Create an Environment
An environment is a 3D virtual space that mirrors your real-world robot setup. It’s where your digital twins live, sensors stream data, and controllers send commands, all in real time.- Go to the Cyberwave dashboard and click New Environment.
- Give your environment a name and description.
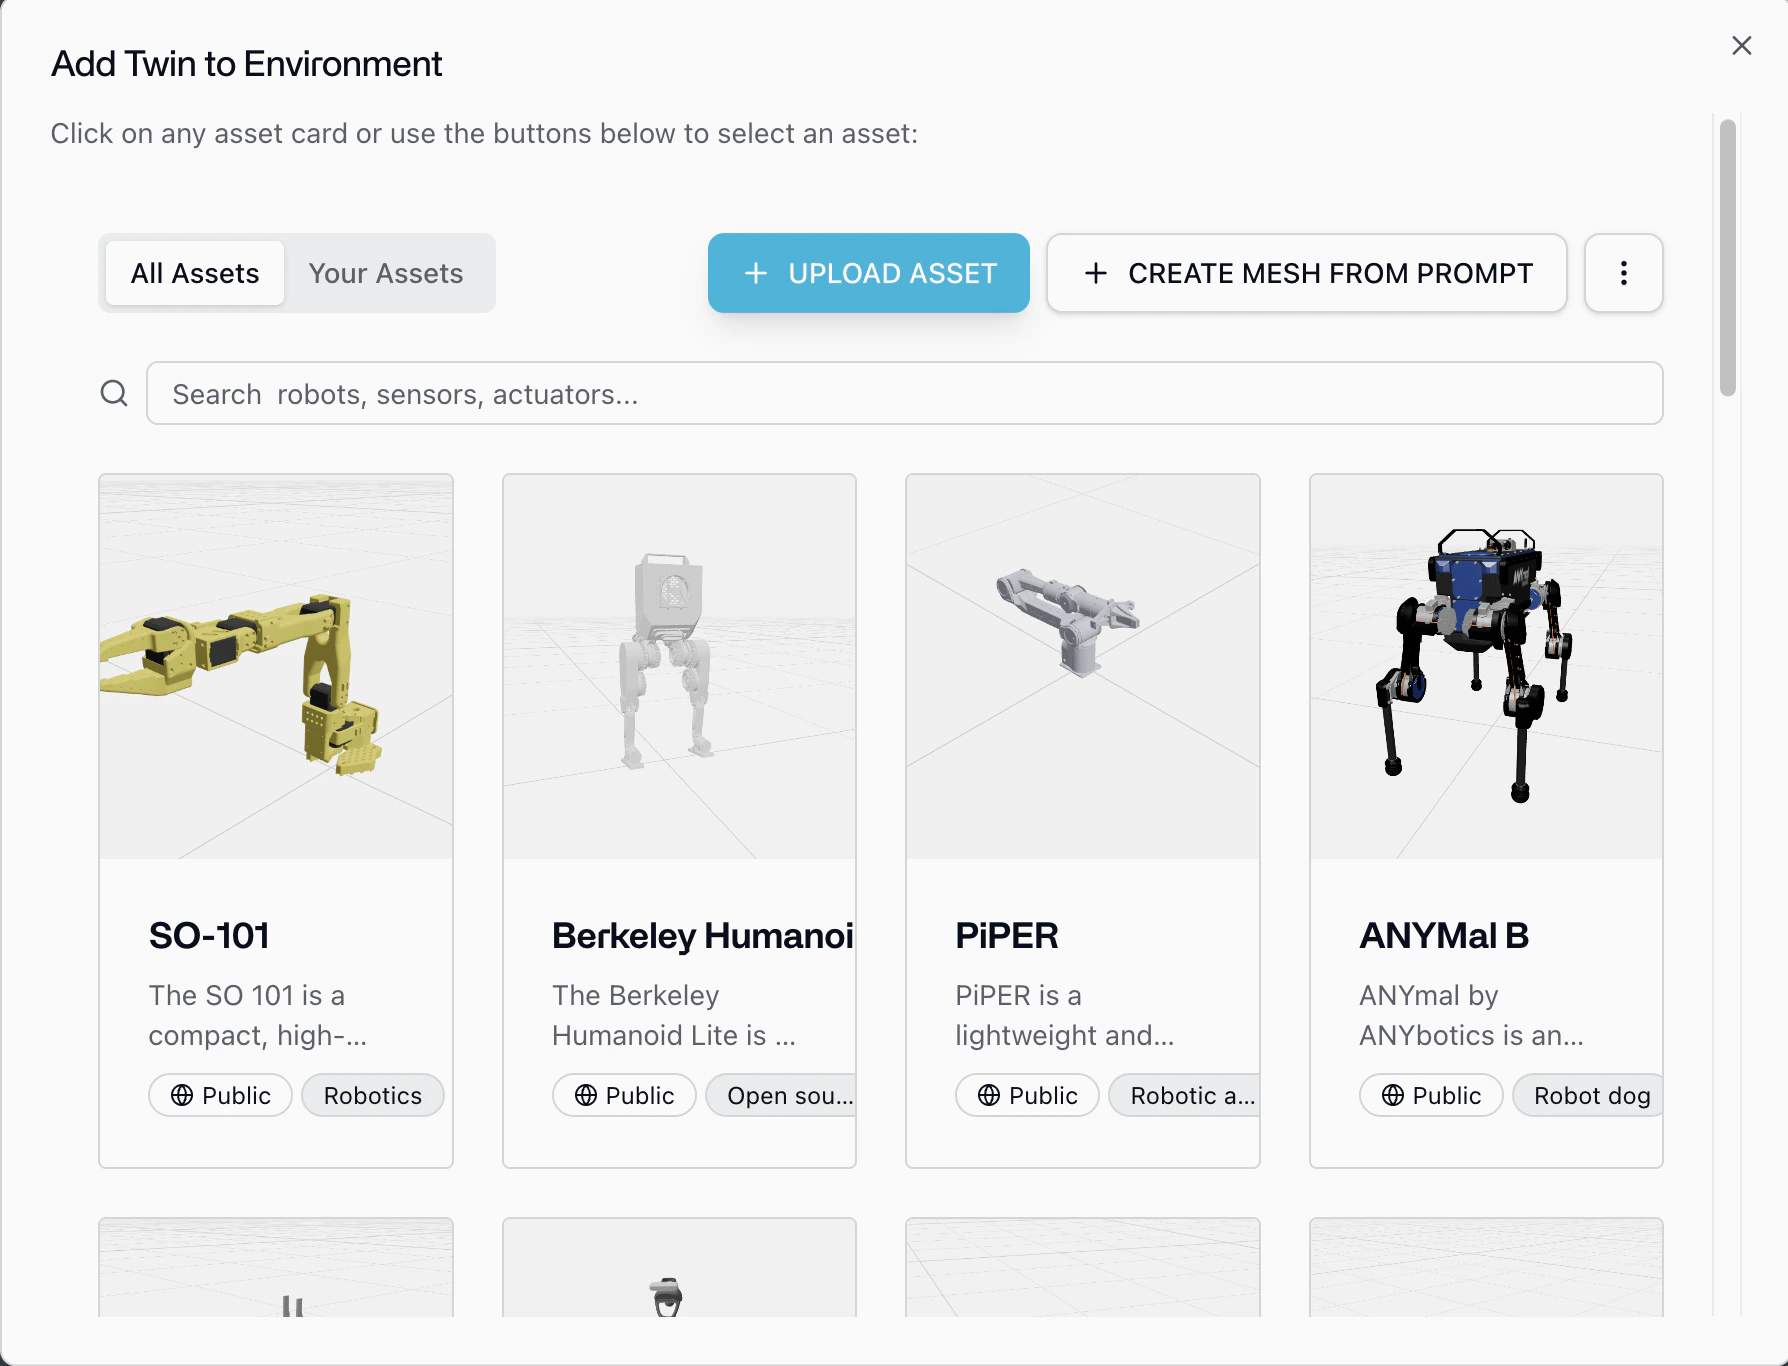
Step 2: Add a Digital Twin
A digital twin is a virtual replica of your physical robot, it mirrors the robot’s structure, joints, sensors, and behavior in real time within your environment.- Inside your environment, click Add from Catalog in the left panel.
- Browse the catalog, find your robot, and add it to the environment.
- Position the twin to match your physical setup.
Browse Catalog
Explore our robot catalog
Step 3: Build Your Application
With your environment and digital twin ready, you can start building immediately. Your application code runs anywhere, laptop, cloud server, CI pipeline and talks to Cyberwave Cloud over the API.Python SDK
Control twins, capture frames, trigger workflows, and manage infrastructure programmatically
MCP Server
Let AI agents (Claude, GPT, Cursor) manage your robotics setup through natural language
REST API
Direct HTTP access to every Cyberwave operation from any language
Step 4: Control Your Twin in Simulation
You can control your digital twin in simulation in two ways: through the dashboard UI or through code.- Dashboard UI
- Python SDK
Control your twin directly from the Cyberwave platform, no code needed.
- Open your environment in the Cyberwave dashboard.
- Switch to Simulation mode.
- Click the Assign Controller button on your twin.
- Select a controller from the list, for example:
- Keyboard: control individual joints using keyboard keys
- Start moving the twin using the assigned controller. You’ll see the digital twin responding in the 3D environment in real time.
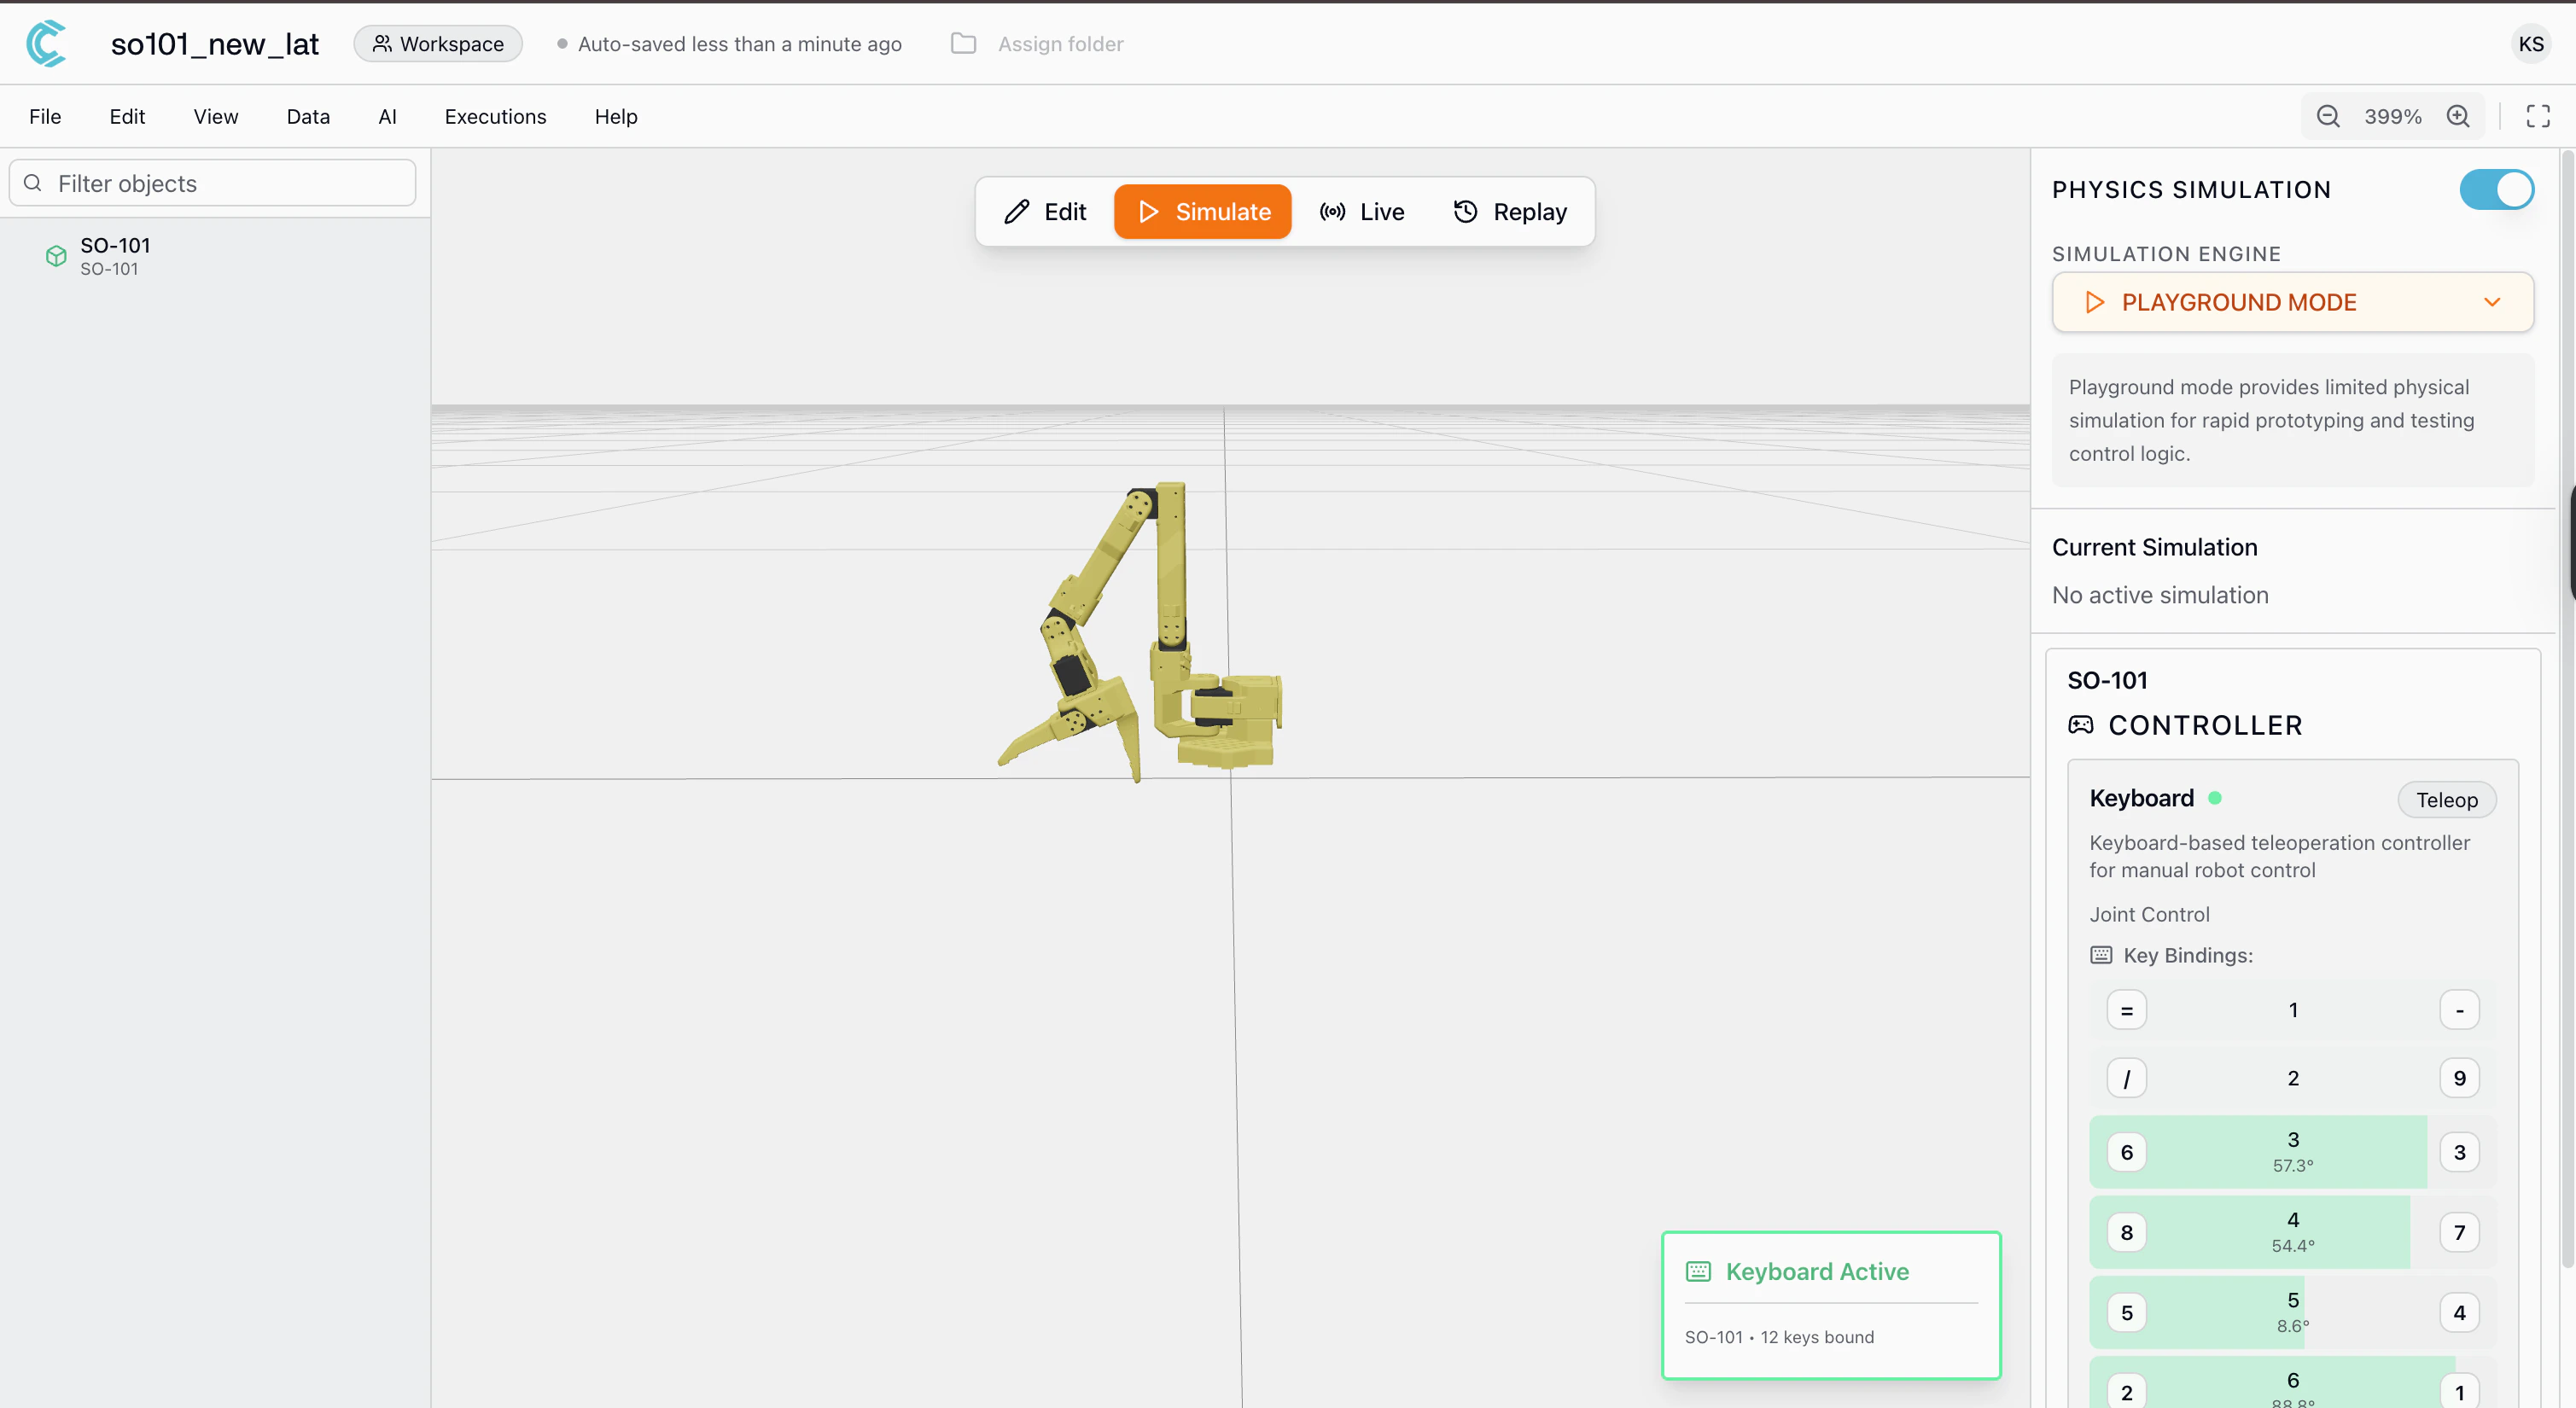
Your twin is being controlled in simulation. Use this to explore how the robot behaves before writing any code or connecting real hardware.
Part 2: Connect Real Hardware
Once your application works in simulation, connect it to the physical robot. These steps run on the machine that is physically connected to the robot, an edge device (Raspberry Pi, Jetson) or your laptop if the robot is plugged in directly via USB.If you’re only working in simulation or building application code, you can skip Part 2 for now and come back when you’re ready to connect hardware.
Step 5: Install the Cyberwave CLI
- Remote Edge Device (Raspberry Pi, Jetson, etc.)
- Robot Connected Directly to This Machine
SSH into your edge device:Then install the CLI:
Step 6: Install the Edge Core
The Edge Core runs on the robot’s machine and bridges your physical hardware to the Cyberwave cloud.cyberwave-edge-core.
Step 7: Pair Hardware with the Digital Twin
Follow the prompts in your terminal:- Select the environment you created in Step 1.
- Select the digital twin you added in Step 2.
- The appropriate driver will be automatically installed and configured for your robot.
Your physical robot is now paired with its digital twin and syncing in real time.
Next Steps
Architecture
Understand the full system architecture
Python SDK
Full SDK reference and examples
MCP Server
Let AI agents manage your infrastructure
SO101 Robot Arms
Set up teleoperation and datasets
UGV Beast
Get started with the UGV Beast
Unitree Go2
Connect the Go2 quadruped